Screen-share privacy
Screen-sharing privacy checklist: browser tabs and Windows apps
Prepare a screen share with Blurryweb: mask browser data, cover private areas in Windows apps, and check the audience view before presenting.
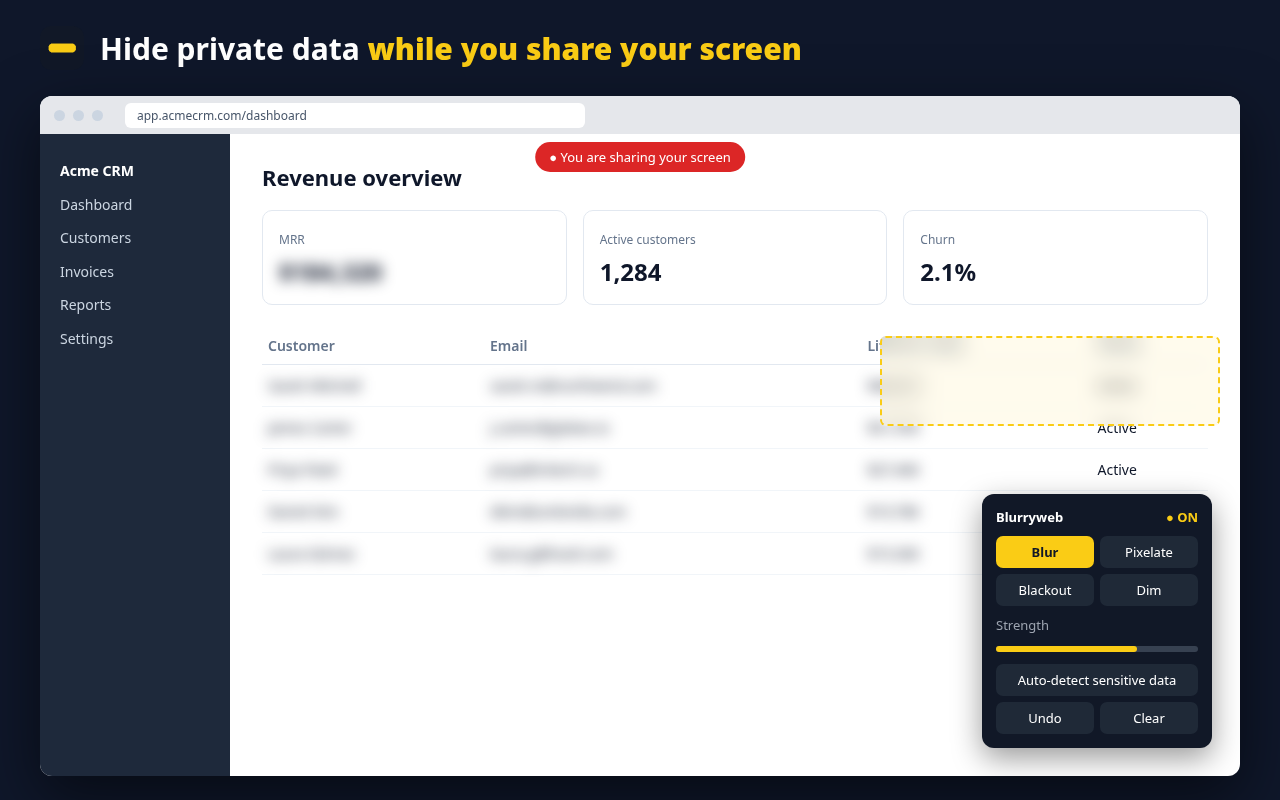
Screen sharing can expose more than the document you meant to present. Customer emails, account balances, messages and terminal output may all be visible. Before a call or recording, prepare the exact screen you will share and check what the audience can see.
Blurryweb offers two ways to cover visible information: a browser extension for web pages and a Windows app for desktop programs. They use the same license key, but their masking behavior is different.
1. Choose the smallest sharing area
If your meeting or recording tool offers it, share a single tab or window rather than your entire desktop. Close unrelated tabs and programs. Turn off notification previews using your operating system's notification settings; Blurryweb's Windows app is not an automatic notification blocker.
Use sample data when possible. A visual cover is a presentation aid, not a substitute for removing confidential data from a file you send to someone.
2. Mask private information in browser pages
Download the browser extension and follow the installation guide. Open the web page you plan to share, then turn on blur mode with the Blurryweb toolbar icon.
- Click a page element to mask it, or drag a privacy zone over a region.
- Use Auto-detect to find supported patterns such as emails, phone numbers, card numbers, money amounts and API keys.
- Check the page yourself: automatic detection cannot guarantee that every sensitive item will be found.
- Choose a mask style suitable for the content. Blackout is preferable when you want an opaque cover rather than a light visual blur.
- Exit drawing mode before you start navigating your presentation.
Saved masks are reapplied per website. Recheck them when a dashboard changes layout or new information appears.
3. Cover private areas in Windows programs
Download the Windows installer, install Blurryweb and open its controls. Click Draw blur zone, then drag over the area you want to cover. Drawing ends after one drag, so you can interact with the screen again; you can also finish or cancel from the controls.
The Windows app uses opaque frosted or blackout privacy covers. It does not sample and blur the pixels of other programs behind it. Draw the cover where the private information appears, and check its position again if you move or resize the underlying window. The current drawing canvas covers the primary monitor, so prepare your presentation there.
4. Check the audience view
Before an important call, make a short test recording or ask someone you trust to check your shared view. Confirm all of these:
- The intended tab, window or screen is being shared.
- Your browser masks or Windows covers actually appear in the captured view.
- Customer details, passwords, API keys and financial figures are not readable.
- Scrolling, opening menus and changing pages do not reveal new private information.
- Moving a window does not leave a fixed privacy cover behind.
Blurryweb has not been certified with every meeting or recording application. In particular, do not assume a separate Windows cover will be included when capturing only another application's window: test that capture mode first.
5. Keep privacy checks part of the presentation
Pause sharing before opening an unrelated account or rearranging desktop windows. When you finish, review a recording before distributing it. If a credential was exposed, revoke or rotate it; covering it later does not undo the exposure.
Browser extension or Windows app?
Use the extension for web dashboards, browser-based email and online demos. Use the Windows app when you need a visible cover over a desktop program such as Excel, Outlook or a terminal. Neither option removes the underlying information from a document, website or downloaded file.
For downloads and plans, visit Blurryweb. If you need to free an activation slot, open Manage License.